Showing posts with label healthy. Show all posts

Sunday, March 31, 2013

Easy Maple Granola

 
First of all, I hope everyone has had a lovely Easter holiday!  I have been a busy little bee the last few days.  See, I'm graduating (WOOHOO!!!!!!) with my masters' in May, and was feeling the mid-semester crunch.  I decided on Thursday that I might feel better if I just wrote out a to-do list with due dates for both of my classes the rest of the semester so that I could quantify my stress instead of stressing without bound.  :-)

Once I did that, it all started to seem more manageable.  I started tackling my to-do's and before I knew it, I had read four chapters, taken 3 tests, knocked out 2 major projects, and written 3 papers. 

Like a boss.

So now all that stands between me and my M.Ed. has been pared down to 6 lines on a to-do list.  (Two of them are going to be pretty intense, but we're just going to ignore that for now.)

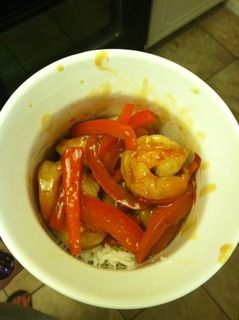
After all that work, I retreated to the kitchen to whip up some homemade granola.  Except I couldn't find the recipe I usually use.  (Darn!)  It turned out to be a blessing in disguise- the new version I found has a fraction of the oil and cooks up in less than 1/3 the time of my usual.  (And fewer dirty dishes!  Heckyesscore!!!)

This recipe is forgiving, so if you want to throw in a few extra almonds or add some pecans or walnuts, knock yourself out.  I did!

Minimally adapted from Cafe Sucre Farine, Originally from Barefeet in the Kitchen

INGREDIENTS
2 cups old fashioned rolled oats
1 cup sliced almonds
½ teaspoon salt
½ cup pure maple syrup
1 Tbsp vegetable oil
1 teaspoon vanilla extract

DIRECTIONS
1. Preheat the oven to 350˚F. Line a large baking sheet with parchment paper.

2. Stir together all ingredients to coat thoroughly. Spread across the parchment paper and bake for 15-18 minutes, stir the mixture after 10 minutes and spread across the tray again before returning to the oven.

3. Let cool completely before transferring to an airtight container. Use as a topping on yogurt or fresh fruit, oatmeal or for a quick, healthy snack.


Pin It!

Tuesday, October 9, 2012

Weeknight Kung Pao Shrimp

What I've been up to lately:
Sharing an experience of a lifetime with the most wonderful group of six year olds I know,


Hunting for my first "new" car,


 Cutting out a metric crap-ton of lamination,


Feverishly essay-writing,


 And painting my fingernails.  Poorly.  Very poorly.


Anyway, with everything going on, I've been doing well to get dinner on the table, much less neatly photographed and accompanied by a semi-witty intro.  In fact, I haven't been inspired to blog at all lately.  Until this happened:


It may not look like much right there, but this Kung Pao Shrimp is officially my favorite weeknight meal.  It's a true 30-minute dish from start to finish.  (Don't you hate when a recipe is rated as a 30-minute meal, but they expect you to have already chopped 19 million different veggies and pre-cooked the protein?!)  Anyway, the ingredient list was so skimpy that I wasn't expecting fireworks, but the final product was amazing.  Garlicky, spicy, and flavorful, it beats my favorite take out hands-down. 

Very slightly adapted from Cook's Country, October/November 2007 issue

INGREDIENTS
1 cup low-sodium chicken broth
3 tbsp oyster sauce
2 tsp hot sauce (I used chili paste from my local Asian grocer, & Sriracha would be fine.)
2 tsp cornstarch
2 tbsp vegetable oil, divided
1 lb extra-large shrimp, peeled & deveined
1/2 cup dry-roasted peanuts
1 red bell pepper, seeded and chopped
3 garlic cloves, minced

1.  Whisk chicken broth, oyster sauce, hot sauce, and cornstarch in a bowl.  Set aside.

2.  Heat 1 tbsp oil in a large skillet over medium high heat until shimmering.  Add shrimp and peanuts and cook until shrimp are speckled with brown, about 2 minutes.  Transfer to a plate. 

3.  Add remaining oil and bell pepper to empty skillet and cook until lightly browned, about 3 minutes.  Stir in garlic and cook until fragrant, about 30 seconds.  Stir in sauce mixture and bring to a boil.  Add shrimp and peanuts and simmer until sauce has thickened and shrimp are cooked through, about 1 minute.  Serve over rice.


Pin It!

Monday, September 17, 2012

Tortellini Minestrone


I've been on a quest lately to find healthy, filling meals that I can get on the table in a hurry.  This one definitely fits the bill- it's chock full of veggies and on the table within 30 minutes. 

I didn't care for the canellini beans in the soup and plan to leave them out next time.

As seen on Cook Like a Champion, originally from Cook’s Illustrated Soups, Stews & Chilis

INGREDIENTS
1 tablespoon olive oil
2 carrots, peeled and cut into 1/2-inch pieces
2 stalks of celery, cut into 1/2-inch pieces
1 medium onion, minced
5 ounces mushrooms, sliced
4 garlic cloves, minced
1 tablespoon minced fresh oregano, or 1 teaspoon dried
3 1/4 cups low-sodium chicken or vegetable broth
2 3/4 cups V8 vegetable juice
1 (15-ounce) can cannellini beans, drained and rinsed
1 (9-ounce) package fresh cheese tortellini (preferably whole wheat)
1 medium zucchini, halved lengthwise, seeded, and cut into 1/2-inch pieces
Salt and freshly ground black pepper
1/2 cup pesto (homemade, or if store-bought, use the refrigerated variety)
Freshly grated Parmesan, for serving

DIRECTIONS
Heat the oil in a large Dutch oven over medium heat. Add the carrots, celery, onion, 1/4 teaspoon of salt and pepper to taste. Cook for 3-5 minutes, until just softened. Add the mushrooms and continue cooking until all the vegetables have softened, 5-6 additional minutes. Add the garlic and oregano and cook about 30 seconds, until fragrant.

Pour in the broth, making sure to scrape up any browned bits. Stir in the vegetable juice and beans and bring to a boil. Reduce heat to a simmer and cook for about 10 minutes. Add the tortellini and zucchini and continue simmering until tender, another 5-7 minutes. Taste and add salt and pepper as needed. Divide among serving bowls and top each portion with a spoonful of pesto and a sprinkling of Parmesan before serving.


Pin It!

Thursday, June 14, 2012

Spinach Strawberry Salad with Homemade Raspberry Vinaigrette


I'm sorry I left y'all hanging with my other post!  This salad just screams summer.  From the fresh strawberries to the tangy vinaigrette, you won't be able to get enough!  I didn't include measurements for the salad- we just eyeballed it.


Summery Spinach Salad

INGREDIENTS
Baby spinach
Sliced fresh strawberries
Cooked, cubed chicken
Crispy bacon pieces
Sugared pecans
Homemade raspberry vinaigrette, recipe to follow

Raspberry Vinaigrette
Adapted from The Taste of Home Cookbook

INGREDIENTS
1/2 cup raspberry vinegar
1 tbsp white sugar
1/2 cup olive oil
1/2 tsp dijon

1 tbsp minced shallot
1 clove garlic, minced
 Dash pepper

DIRECTIONS
 1.  Combine all ingredients in a medium bowl.  Whisk well to combine.  Refrigerate until serving.


Pin It!

Saturday, December 31, 2011

(Oh My Darling) Clementine Smoothies

 
I've talked before about my grandparents' incredible green thumbs.  From cucumbers, squash, and potatoes to lemons bigger than grapefruits (literally!), they  grow anything and everything.  Each time I visit, my grandpa is sure to send me home with a sack full of something delicious.  As we left our Christmas gathering, he gave us a mess of the sweetest, juiciest Clementines I've ever eaten.  We enjoyed most of them straight from the fridge, and the rest in the form of these creamsicle-inspired smoothies.  Yum!

Don't have Clementines?  Substitute 2 small, seedless oranges instead.

An Ommy Noms Original

INGREDIENTS
3 Clementines, peeled
1 banana
1/2 cup yogurt (I used Greek yogurt)
1/2 cup milk
6-7 ice cubes

DIRECTIONS
1.  Combine all ingredients in a blender and pulse until smooth and well-incorporated.  Pour into glasses and enjoy!
Pin It!

Sunday, December 11, 2011

Baked Oatmeal- Healthy and Delicious!

Awhile back, I told you guys that I was really not a breakfast food person.  I'd like to go ahead and take that back now.


A couple of years ago, my parents built a vacation cabin out in the country.  Its kitchen has over four times as many cabinets and drawers as mine.  Nope, I'm not bitter at all!  Aside from being a wonderful place to slow down and relax for a few days, the cabin is synonymous with a good old fashioned spoiling.  While we're there, I wake up most mornings to the smell of a delicious breakfast on the stove or in the oven.  On our last trip, my mom cooked up this tasty baked oatmeal and I recreated it at home this morning.  I love everything about this dish from the bursting-with-flavor blueberries to the crunchy pecans.  I'm looking forward to having leftovers for breakfast tomorrow. 

Adapted from Super Natural Every Day, via Annie's Eats


* For gluten-free diners, use 100% pure maple syrup and vanilla extract along with gluten-free oats, such as those from Bob's Red Mill.

INGREDIENTS
1 cup old fashioned rolled oats
¼ cup chopped walnuts or pecans, lightly toasted, divided
½ tsp. baking powder
¾ tsp. ground cinnamon
Pinch of salt
¼ cup maple syrup
1 cup milk
1 large egg, lightly beaten
2 tbsp. unsalted butter, melted and cooled slightly
1 tsp. vanilla extract
1-2 ripe bananas, peeled and thinly sliced
1 cup fresh blueberries, divided

DIRECTIONS
1.  Preheat the oven to 375˚ F.  Lightly grease a 2-quart baking dish.  

2.  In a medium bowl, combine the rolled oats, half of the nuts, baking powder, cinnamon and salt.  Stir with a fork to combine.  In a liquid measuring cup, combine the maple syrup, milk, egg, butter, and vanilla.  

3.  Spread the sliced bananas in a single layer over the bottom of the baking dish.  Top with half of the berries.  Sprinkle the dry oat mixture over the fruit in an even layer.  Pour the liquid ingredients evenly over the oats.  Sprinkle the remaining nuts and berries over the top.  

4.  Bake for 35-40 minutes, until the top is browned and the oats have set.  Let cool 10 minutes before serving.
Pin It!

Saturday, October 1, 2011

Black Bean Salad


This black bean salad, aka "Texas Caviar" is great on tortilla chips or on its own as a quick and easy side dish.  Be sure to rinse the beans well if you want to keep it looking pretty.

 From Allrecipes

* For gluten-free diners, double check your cans of black beans and corn for gluten sources.   Trader Joe's and Amy's black beans are gluten-free for sure, as are Del Monte cans of whole-kernel corn.  For the dressing, you can opt to make your own vinaigrette or purchase a bottle of gluten-free dressing.  Annie's Naturals, Ken's Steakhouse, Newman's Own, and Wishbone all make gluten-free Italian dressings.

INGREDIENTS

1 (15 ounce) can black beans, rinsed and drained
2 (15 ounce) cans whole kernel corn, drained
8 green onions, chopped
2 jalapeƱo peppers, seeded and minced
1 green bell pepper, chopped
1 avocado - peeled, pitted, and diced
3 tomatoes, seeded and chopped
1 cup chopped fresh cilantro
1 lime, juiced
1/2 cup Italian salad dressing (more or less to suit your tastes)
1/2 teaspoon garlic powder

DIRECTIONS
1. In a large bowl, combine the black beans, corn, green onions, jalapeno peppers, bell pepper, avocado, tomatoes, cilantro, lime juice, and Italian dressing. Season with garlic powder. Toss, and chill until serving.
Pin It!

Tuesday, September 20, 2011

Roasted Okra


I get a little "Bubba Gump" when I talk about my okra- fried okra, boiled okra, stewed okra, okra gumbo, I love it it all!  Until today, though, I was lacking one glorious method of preparation in my repertoire- roasted okra!  I don't know why I'd never thought to roast it before.  Roasting veggies almost always results in awesomeness, and this was no different.  The roasted okra had less of the "slimy mouthfeel" that my husband loves so much.  (Not!)

Adapted from Allrecipes
Serves 3

* Gluten-free diners should double-check the seasoned salt label for gluten sources.

INGREDIENTS
18 fresh okra pods, stems removed
1 tbsp olive oil
Seasoned salt to taste

DIRECTIONS
1.  Preheat oven to 425.

2.  Place okra and olive oil in a gallon-sized Ziploc and shake to coat.  Place okra on a nonstick baking sheet in a single layer.  Place in preheated oven and roast until tender, about 10-15 minutes.
Pin It!

Monday, July 11, 2011

Blackening Mix

Summertime during childhood usually meant day trips to Galveston.  After a stroll down Seawall Boulevard, we always made a beeline straight for Gaido's Seafood.  Now, Gaido's is kind of a fancy-pants restaurant to a kid, but I certainly didn't mind.   I'm still convinced that foodie heaven lies somewhere amidst the skewers of blackened shrimp and the thick slices of parmesan-crusted green tomatoes.


I haven't been to Gaido's in years, but I caught a craving for blackened-anything last week.  I whipped up a batch of blackened chicken using this flavorful homemade rub.  It was delicious, and I can't wait to try it with shrimp!

Blackening mix adapted from About.com

INGREDIENTS
1 tbsp paprika
1 tsp chili powder
1 tsp onion powder
1 tsp garlic powder
1/2 tsp thyme
1/2 tsp oregano
1 tsp salt
1/2 tsp black pepper
1/2 tsp sugar

DIRECTIONS
1.  Combine spices in a small bowl and mix well.  Store in an airtight container.

***************************

Blackened chicken adapted from Allrecipes

INGREDIENTS
4 boneless, skinless chicken breasts
1 1/2 tbsp blackening mix
1 tbsp olive oil

DIRECTIONS
1.  Preheat oven to 350 degrees.  Pound chicken breasts to an even thickness.  Pat dry and sprinkle with blackening mix on both sides.

2.  Pour olive oil in a nonstick, oven-safe skillet.  Heat over medium-high until shimmering but not smoking.  Add chicken breasts and sear, about 3 minutes per side.

3.  Place skillet in the preheated oven and bake until internal temperature is 165 degrees, 15-20 minutes.
Pin It!

Wednesday, June 29, 2011

Fig Leather


Mom likes to say that my generation has it easy when it comes to research projects.  Gone are the days of sitting in a shadowy microfiche room, searching, squinty-eyed, for a hidden gem.  Now, we can access all manner of articles with the click of a mouse.

Sorry to tell you, Mom, but research just got even easier.  Thanks to the wonderful world of  Google Books, I am (almost) done with my first grad school term paper.  I've used this nifty site to access dozens of professional books, many of which are out of print. 


So what does my research paper have to do with food?  Well, I can only look at online textbooks for so long before my brain begins to wander.  I've had figs on my mind lately, and decided I'd poke around Google Books to see if there were any books about them.  Jackpot!  I found a USDA bulletin from 1921 called Fig Growing in the South Atlantic and Gulf States.  Inside, I found several suggestions for preserving figs, but one method in particular- fig leather, caught my eye.  I went straight to the kitchen and got to work.  The product was amazing- a mildly sweet Fruit Roll-up for adults, full of figgy flavor. 

Adapted from Fig Growing in the South Atlantic and Gulf States

INGREDIENTS
2 cups fresh figs, washed and stems removed
1 tbsp powdered sugar

DIRECTIONS
1.  Line a baking sheet with heat-safe plastic wrap or parchment paper and set oven to "warm".
2.  Puree figs in a food processor.  Spread fig puree onto plastic wrap (or parchment paper) in a very thin layer.
3.  Place baking sheet in the warm oven.  Remove when fruit leather is fully dehydrated and peels off in a single sheet, about 10-12 hours.  (Leather may be slightly tacky to the touch.)
4.  Separate fig leather from cooking surface.  Sprinkle with powdered sugar and roll up like a jelly cake.  Slice into serving-size pieces and store in an air-tight, moisture proof container.
Pin It!

Thursday, June 16, 2011

Tomato, Cucumber, and Onion Salad with Homemade Vinaigrette


My husband is Mr. Fix-it.  Computers, lawn mowers, ancient video game systems- you name it, he can fix it.  (Case in point:  He bought an Ipod from Goodwill this week for four bucks and had it working in less than an hour!)

Anyway, he's become the go-to man in the neighborhood for computer and small-engine repair.  In return, our neighbors often bless us with goodies from their gardens.  It's not uncommon for us to come home to a bag of grapefruit or cucumbers on our front stoop.  One time, we even came home to find our ugly, overgrown aloe vera plant cleaned up and looking spiffy.  (Yessss!)

For lunch today, I made a salad with a cucumber and heirloom tomato from the neighbors, along with one of my deliciously sweet Noonday onions.  I topped it with a quick homemade vinaigrette.  It was light and refreshing.

An Ommy Noms Original
Serves 1-2

INGREDIENTS
1 medium tomato, diced
1 small cucumber, thinly sliced
1/4 cup sweet onion, thinly sliced
1 tbsp olive oil
1 tsp vinegar of your choice (I used white wine)
1 garlic clove, minced
1 fresh parsley leaf, finely chopped (optional)
Salt and pepper to taste

DIRECTIONS
1.  Layer cucumber, tomato, and onion pieces in a medium bowl.  Combine oil, vinegar, garlic, and parsley in a small prep dish.  Mix with a fork and add salt and pepper to taste.  Pour dressing over vegetables and enjoy!
Pin It!

Tuesday, June 14, 2011

Brandy-Baked Peaches


You know how you go to the grocery store to get one thing and leave with your arms full?  I had one of those grocery trips today.  I just couldn't resist the scent of locally grown peaches, so two of them ended up in my basket.

(Along with about a million other things.)

I searched for a peach dessert that I could throw together with minimal effort, and settled on baked peaches with a brown sugar & brandy glaze.  Oh my, they were delicious.  I only wish I had bought more peaches!

Adapted from The Daily Iberian

INGREDIENTS
1/4 cup brown sugar 
2 tbsp butter
1 tbsp brandy
2 peaches 
Whipped cream, optional

DIRECTIONS
1.  Preheat oven to 350 degrees.  Peel peaches and cut into quarters.  Remove pit and discard.  Place peaches in an oven-safe glass baking dish.  (I used a small Corningware dish.)
2.  Melt the butter in a small saucepan.  Add the brown sugar and brandy, and stir to combine.  Drizzle over peaches.
3.  Bake the peaches in the preheated oven until soft, about 30 minutes.  Top with whipped cream, if desired.
Pin It!

Tuesday, June 7, 2011

Watermelon Frozen Yogurt


What foods remind you of summertime?  For me, it's watermelon- specifically, sitting on the back porch with my very own wedge, juice dripping off my fingers.  When I saw this watermelon fro yo on Tastespotting, I had to try it.  It's a dessert tailor-made for a Texas summer day- the Greek yogurt provides a tangy complement to the fresh taste of watermelon.  It's low in fat and calories, so don't feel bad if you shovel down half the batch in one sitting.  Not that anyone would do that, right?

(Hey, stop looking at me!)

From Menu for Love 

INGREDIENTS
2 cups seedless watermelon chunks
1 cup Fage 0% yogurt
About 1/3 cup sugar (to taste)
Juice of half a lime
1 1/2 Tbsp vodka (keeps your fro yo from turning into a giant ice cube)

DIRECTIONS
1.  Chop the watermelon into chunks and remove the large white seeds, if any. Add to blender and puree.  Strain out the grainy pulp and discard.

2.  Return watermelon juice to the blender.  Add the yogurt, lime juice, and vodka, and blend until well-combined.  Add sugar a little at a time.  Taste and adjust sugar as necessary. 

3.  Add the mixture to the ice cream maker and mix until frozen, about 20 minutes.

Watermelon
Pin It!

Saturday, June 4, 2011

Pan-seared Tilapia with Jalapeno-Lime Butter


A friend of mine gave me a goodie-bag full of home grown cherry tomatoes and jalapenos yesterday.  Score!  The tomatoes didn't last long around me.  (If you have never eaten a home grown tomato, you are missing out!)  I concocted this jalapeno-lime butter to dress up seared tilapia, and it was a big hit. 

I've got 3 jalapenos left- any ideas?

Seared Tilapia

*  Gluten-free diners should double-check their seasoning for gluten sources.

INGREDIENTS
1 tbsp olive oil
4 tilapia fillets
Salt and pepper (or Cajun seasoning if you're feeling spicy!)

DIRECTIONS
1.  Pat fillets dry with a paper towel and season on both sides with salt and pepper.
2.  Heat the olive oil in a skillet over medium heat.  Add the tilapia and cook until the fish flakes easily with a fork, about 3-4 minutes per side.

Jalapeno-Lime Butter
An Ommy Noms Original

INGREDIENTS
1/2 stick butter, room temperature
1 jalapeno pepper, finely diced
Juice of 1/2 a lime

DIRECTIONS
1.  Combine all ingredients in a small bowl.  Dollop onto seared tilapia fillets.
Pin It!

Monday, May 30, 2011

Roasted Butternut Squash

Butternut squash, where have you been my whole life???

I know it's a winter vegetable, but I just couldn't pass up the butternut squash display at the Asian market yesterday.  I was a little worried about trying a new veggie after Luffa Disaster 2K11, but the butternut squash was anything but disastrous.  I was impressed with its smooth texture and pumpkin-like flavor.  My only regret is that I didn't buy two of them.  I am dying to try this butternut squash risotto

Inspired by Whole Foods
Serves 4

INGREDIENTS

1 butternut squash
1 tbsp olive oil
1 tbsp brown sugar
1/4 tsp garlic powder
Salt and pepper to taste

DIRECTIONS

1.  Preheat oven to 400.  Wash squash thoroughly.  Poke several holes in the squash with a fork.  Microwave on high for 2 minutes.

2.  Cut off the top and bottom of the squash.  Peel (carefully!) with a sharp knife, and cut flesh into one-inch pieces.

3.  Place squash pieces in a medium bowl.  Drizzle with olive oil.  Add brown sugar, garlic powder, salt, and pepper.  Stir to combine.  Pour onto a nonstick baking sheet with sides and spread so that squash pieces are in a single layer.

4.  Roast for 30 minutes, stirring after 15 minutes.  Taste and adjust seasonings as necessary.
Pin It!

Sunday, May 22, 2011

Open-Faced Avocado Sandwich

It's a rare occasion to find perfectly ripe avocados at my local grocery store, but I hit the jackpot yesterday.  As I pondered the destiny of my delightful green fruit, I stumbled upon recipe for an avocado sandwich that I just *had* to try. 

This sandwich was perfect for an avocado fiend like me- simple and delicious.  Next time, I'm going to save the calories and omit the olive oil.  (It didn't add anything extra to the flavor or texture.)

And, just a disclaimer, this meal is not husband-approved.  He'd probably look at me like I had three heads if I plopped a plate of avocado-on-toast in front of him.  (He doesn't know what he's missing out on, does he?)

Adapted from The Hungry Mouse
Serves 2

INGREDIENTS
2 slices of bread, toasted
1 avocado, pitted and peeled
Juice of half a lime
1 tsp olive oil (optional)
Salt and pepper to taste

DIRECTIONS
1.  Place the avocado in a medium bowl.  Add lime juice.  Mash the avocado with a fork, stirring to incorporate lime juice.  Spread half the avocado mixture on each slice of bread.  Drizzle with olive oil if desired, and season to taste.
Pin It!

Sunday, May 15, 2011

Scallion and Garlic Shrimp

My husband and I are big fans of Asian cuisine.  But let me tell you what I am NOT a big fan of- ginger.  As a kid, my family frequented a local restaurant that served the most delicious Cantonese chow mein.  It was chock full of meats, veggies, and crunchy pan-fried noodles, doused in a rich brown sauce.  Mmm!  Unfortunately, the cooks at this restaurant were very fond of ginger.  And I'm not talking about finely diced ginger, either.  The dish was riddled with chunks of ginger root the size of your thumb.  Shudder.

The lovely brown sauce did a bang-up job of disguising the offending spice as, say, an innocent mushroom.  So eating the dish was kind of like playing a game of Minesweeper with your food- you had to clear the good stuff off your plate without accidentally chomping a ginger-bomb.  (Guess who always managed to find the bomb?  Yep- yours truly.) 


That brings me to tonight's entree.  Try as I might, I couldn't bring myself to buy the ingredient that caused me so much dinnertime strife as a kid.  But with an ingredient list so simple, I didn't want to leave the ginger out without replacing it with another flavor.  A splash of soy sauce fit the bill.  The resulting dish was light and really hit the spot.  The best part was that it only took 25 minutes from start to finish.  It would make a great after-work entree, although I would probably prepare the scallions the night before.

Adapted from Rachael Ray

INGREDIENTS

1 large egg white
1 tbsp cornstarch
1 1/2 tsp sugar
2 tsp salt
1/2 tsp black pepper
1 lb shrimp, shelled and deveined

4 garlic cloves, minced
1/2 tsp crushed red pepper flakes
1/2 tbsp soy sauce
Vegetable oil to coat pan
4 scallions, thinly sliced lengthwise, cut into 1 inch pieces, dark green parts set aside
Steamed rice

DIRECTIONS

1.  In a medium bowl, whisk egg white, cornstarch, sugar, salt, and black pepper until a paste forms.  Add shrimp and toss to coat.  Set aside to marinate for 10 minutes.  Meanwhile, combine garlic, red pepper flakes, and soy sauce in a small bowl; set aside.

2.  Drain marinade from shrimp.  Coat bottom of a large skillet with oil.  Heat over medium-high until shimmering.  Add shrimp, along with the light green and white scallion pieces, and stir to coat with oil.  Cook, stirring and scraping up any brown bits from the bottom of the skillet, until the shrimp are almost cooked through, about 2 minutes.  Add garlic mixture and dark green scallion pieces.  Continue to cook until shrimp are cooked through, about one minute.

3.  Season to taste with salt and pepper.  Serve over steamed rice.
Pin It!

Overnight Steel-Cut Oats


I consider myself a pretty healthy eater.  I use my fryer about once a year, and I almost always decrease the amount of butter or oil in a dish before I make it.  I sub milk or half and half for cream.  (Most of the time.)  I don't gorge myself on chocolate, cakes, and other treats.  Except during Teacher Appreciation Week, when delicious goodies are at every turn and calories don't count.
  
As I was saying, I'm a pretty healthy eater.  I have limits though.  I don't eat celery, I start most days with a bowl of knock-off Lucky Charms, and I have never bought a jug of skim milk in my life.  (I figure, if I ever get a hankering for it, I'll find a way to dye water white.) 

So that brings me to oatmeal.  Ah, oatmeal.  Whenever I'm reading Charlotte's Web to my students, I always imagine that the slop in the pigs' trough is probably leftover oatmeal that the children refused to eat.  I'll choke down one of those packets of Super Sugar Maple Brown Sugar Here's Some More Sugar For Good Measure oatmeal, but the real stuff?  No way.  And I've seen steel cut oats in the health food aisle before, but I thought that they probably tasted even worse than regular oatmeal.

Oh, but I was wrong.

Steel cut oats have a delicious chew instead of that glop-in-the-mouth feel that standard oatmeal has.  They have more flavor and go great with a smattering of banana slices and pecans on top.  I've seen the light! 

Seen on Cooking With Chrissy
Originally from Good Life Eats, adapted by The Novice Chef

INGREDIENTS

1 cup steel cut oats
1 3/4 cups milk
2 tablespoons brown sugar
4 ounces applesauce
1/2 teaspoon cinnamon
pinch of salt

DIRECTIONS

In a nonmetal bowl, combine oats, brown sugar, applesauce, cinnamon and salt and stir to combine. Stir in milk; cover and chill for 8 to 24 hours.

To serve, transfer oatmeal mixture to a medium saucepan. Heat the oats just until it begins to boil, then reduce the heat to low. Simmer, uncovered, for 5 minutes or until oatmeal is done, adding additional milk if desired and stirring occasionally.

Remove from heat. Add your favorite mix-ins, and serve with additional milk, if desired.
Pin It!

Monday, May 9, 2011

Pasta e Fagioli

I'll admit it- eating at the Olive Garden is one of my guilty pleasures.  And the only thing that's better than Olive Garden's Chicken Scampi is their endless soup, salad, and breadsticks special.

I've tried most of the soups, but I always go back to the pasta e fagioli.  It's hearty and satisfying, with just the right amount of spice.  So when this recipe came across my Google Reader last month, I knew I had to try it.  It was quick and easy to throw together after work and was just as satisfying as its restaurant counterpart.

Two quick notes:  I will tell you that "large pot" means LARGE pot.  I had to break out the biggest, deepest pot I own when I realized I wouldn't be able to fit it all in my 3 quart.

I didn't have a cheese rind, so I just sprinkled a good bit of shredded parmesan into the soup along with the beans.  No harm, no foul.

Adapted from Stephanie Cooks, originally from Cook's Illustrated

INGREDIENTS

1 tbsp extra virgin olive oil
3 ounces of pancetta or bacon, finely chopped
1 medium onion, finely chopped
4 medium cloves of garlic, minced
1 tsp. dried oregano
1/4 tsp. red pepper flakes
1 28 oz can diced tomatoes
1 parmesan cheese rind
2 (15 1/2 oz) cans cannellini beans
3 1/2 cups chicken broth
1 cup water
8 ounces small pasta
Salt and pepper to taste
Shredded parmesan to top

DIRECTIONS


1.  Heat the oil in a large pot over medium heat.  Add the pancetta or bacon, and cook until browned, about 3-5 minutes.  Add the onion and garlic, stirring frequently, until softened, about 5-7 minutes.

2.  Add the garlic, oregano, red pepper flakes, tomatoes (and the juices from the can), scrapping up the brown bits on the bottom. Add cheese rind and beans, reduce heat to low, and cook 10 minutes.

3.  Add chicken broth.  Increase heat to high and bring to a boil. Add the pasta and cook until pasta is cooked, about 8-10 minutes.

4.  Turn off the heat and discard the cheese rind. Season with salt and pepper.  Ladle into bowls- top with additional shredded parmesan cheese.
Pin It!

Monday, May 2, 2011

Blackberry-Banana Smoothies


Some of my favorite childhood memories involve going blackberry pickin' with my grandma.  The satisfaction of eating the plumpest, juiciest berries right off the vine made all the battle wounds worth it to me.

"One for the bucket, one for me, one for the bucket, two for me..."

I spent Easter weekend with my Dad and my husband in rural East Texas- a place where cows roam, wildflowers grow unrestrained, and the nights are black and free.

I was delighted to discover the wild blackberry bushes dotting the pastures of my family's acreage.  One morning, we woke up and decided to have ourselves a berry pickin' expedition.  Even twenty years later, most of my berries never make it to the bucket.  Even still, we managed to fill two huge bags with the fruit.

Until yesterday, I'd had but two kinds of blackberries in my life- blackberries off a vine and blackberries in a cobbler.  One can only make so many blackberry cobblers without having to spring for a Weight Watchers membership, so I concocted these delicious smoothies as an alternative.  The only thing better than a strawberry-banana smoothie is a blackberry-banana one.  Try it, and I think you'll agree.

An Ommy Noms Original
Serves 2

INGREDIENTS

1 1/2 cups frozen blackberries (or 1 1/2 cups fresh berries plus 3 ice cubes)
1 ripe banana, cut into chunks
1 single-serving container Greek yogurt
1 cup milk

DIRECTIONS

1.  Add all ingredients to a blender and pulse until smooth and well-incorporated.  Strain to remove seeds and pour into glasses.
Pin It!

LinkWithin

Related Posts Plugin for WordPress, Blogger...