Sunday, December 16, 2012

Turkey (or chicken) Tetrazzini


My husband and I are not usually into casserole-type meals, but this tetrazzini was a very pleasant surprise.  I took several liberties with the original recipe, jazzing up the sauce with garlic and spices while cutting back on the butter and cream.  After digging into it for dinner tonight, I wouldn't change a thing next time.  It was a nice way to use up some of the leftover Thanksgiving turkey we've got in the freezer.

INGREDIENTS
8 oz dry spaghetti, broken in half
3 tbsp butter
1 small onion, diced
10 oz button mushrooms, sliced
3 cloves garlic, minced
3 tbsp flour
1 cup chicken broth
3/4 cup cream
1/2 cup milk
2 cups cooked turkey or chicken, diced
1/4 tsp red pepper flakes
1/4 tsp black pepper
Seasoned salt to taste
1/2 cup Parmesan, divided

DIRECTIONS
1.  Preheat oven to 350.  Grease a 9 X 13 pan.

2.  Bring a pot of lightly salted water to a boil.  Add spaghetti noodles and cook until al dente, about 7 minutes.  Drain.

3.  Meanwhile, in a large pan, melt butter over medium heat.  Add onion and mushrooms and sauté until onions are translucent and mushrooms are beginning to brown, about 8-10 minutes.  Add garlic and stir until fragrant, about 30 seconds. 

4.  Reduce heat to low.  Add flour and cook, stirring constantly, for 1 minute.  Add chicken broth and stir until smooth.  Add cream, milk, and 1/4 cup Parmesan cheese and stir until combined.  Bring to a low boil and allow to cook until slightly thickened, about 2 minutes.  Add poultry, seasonings, and cooked spaghetti and stir well.

5.  Pour mixture into prepared pan and top with remaining Parmesan cheese.  Bake in preheated oven until cheese has melted and dish is hot and bubbly, 15-20 minutes.


Pin It!

Sunday, December 9, 2012

Texas Sheet Cake


I sampled a bit of Texas sheet cake at a recent potluck and was hooked immediately.  The icing is poured over the cake while it's piping hot, allowing it to seep into the upper portion of the cake.  The result is a fudgy delicacy that would remind you of molten chocolate cake.  It feeds a ton of people and can be easily thrown together in a pinch.

FYI, I would use cocoa powder rather than flour to coat the pan after greasing next time.  The flour can create a rather unsightly base to your cake.

Also, my jelly roll pan was a little bigger than called for in the recipe.  I baked the cake portion for 12 minutes and it was done.

From The Sisters Cafe

Cake
Bring to a boil:
1/2 c. butter
1 c. water
4 TB cocoa

Mix and add:
1/2 c. buttermilk (or 1/2 c. sour cream)
2 eggs, beaten
1 tsp vanilla

Add:
2 c. flour
2 c. sugar
1/4 tsp salt
1 tsp soda

Beat well. Pour into a greased and floured jelly roll pan (approx. 11 X 7).  Bake in a preheated 400 oven for 15 minutes.

Icing
Bring to a boil:
1/2 c butter
6 TB milk
4 TB cocoa

Add:
4 c. powdered sugar
1 tsp vanilla
dash of salt

Spread icing on cake while cake is still warm.


Pin It!

Tuesday, October 9, 2012

Weeknight Kung Pao Shrimp

What I've been up to lately:
Sharing an experience of a lifetime with the most wonderful group of six year olds I know,


Hunting for my first "new" car,


 Cutting out a metric crap-ton of lamination,


Feverishly essay-writing,


 And painting my fingernails.  Poorly.  Very poorly.


Anyway, with everything going on, I've been doing well to get dinner on the table, much less neatly photographed and accompanied by a semi-witty intro.  In fact, I haven't been inspired to blog at all lately.  Until this happened:


It may not look like much right there, but this Kung Pao Shrimp is officially my favorite weeknight meal.  It's a true 30-minute dish from start to finish.  (Don't you hate when a recipe is rated as a 30-minute meal, but they expect you to have already chopped 19 million different veggies and pre-cooked the protein?!)  Anyway, the ingredient list was so skimpy that I wasn't expecting fireworks, but the final product was amazing.  Garlicky, spicy, and flavorful, it beats my favorite take out hands-down. 

Very slightly adapted from Cook's Country, October/November 2007 issue

INGREDIENTS
1 cup low-sodium chicken broth
3 tbsp oyster sauce
2 tsp hot sauce (I used chili paste from my local Asian grocer, & Sriracha would be fine.)
2 tsp cornstarch
2 tbsp vegetable oil, divided
1 lb extra-large shrimp, peeled & deveined
1/2 cup dry-roasted peanuts
1 red bell pepper, seeded and chopped
3 garlic cloves, minced

1.  Whisk chicken broth, oyster sauce, hot sauce, and cornstarch in a bowl.  Set aside.

2.  Heat 1 tbsp oil in a large skillet over medium high heat until shimmering.  Add shrimp and peanuts and cook until shrimp are speckled with brown, about 2 minutes.  Transfer to a plate. 

3.  Add remaining oil and bell pepper to empty skillet and cook until lightly browned, about 3 minutes.  Stir in garlic and cook until fragrant, about 30 seconds.  Stir in sauce mixture and bring to a boil.  Add shrimp and peanuts and simmer until sauce has thickened and shrimp are cooked through, about 1 minute.  Serve over rice.


Pin It!

Monday, September 17, 2012

Tortellini Minestrone


I've been on a quest lately to find healthy, filling meals that I can get on the table in a hurry.  This one definitely fits the bill- it's chock full of veggies and on the table within 30 minutes. 

I didn't care for the canellini beans in the soup and plan to leave them out next time.

As seen on Cook Like a Champion, originally from Cook’s Illustrated Soups, Stews & Chilis

INGREDIENTS
1 tablespoon olive oil
2 carrots, peeled and cut into 1/2-inch pieces
2 stalks of celery, cut into 1/2-inch pieces
1 medium onion, minced
5 ounces mushrooms, sliced
4 garlic cloves, minced
1 tablespoon minced fresh oregano, or 1 teaspoon dried
3 1/4 cups low-sodium chicken or vegetable broth
2 3/4 cups V8 vegetable juice
1 (15-ounce) can cannellini beans, drained and rinsed
1 (9-ounce) package fresh cheese tortellini (preferably whole wheat)
1 medium zucchini, halved lengthwise, seeded, and cut into 1/2-inch pieces
Salt and freshly ground black pepper
1/2 cup pesto (homemade, or if store-bought, use the refrigerated variety)
Freshly grated Parmesan, for serving

DIRECTIONS
Heat the oil in a large Dutch oven over medium heat. Add the carrots, celery, onion, 1/4 teaspoon of salt and pepper to taste. Cook for 3-5 minutes, until just softened. Add the mushrooms and continue cooking until all the vegetables have softened, 5-6 additional minutes. Add the garlic and oregano and cook about 30 seconds, until fragrant.

Pour in the broth, making sure to scrape up any browned bits. Stir in the vegetable juice and beans and bring to a boil. Reduce heat to a simmer and cook for about 10 minutes. Add the tortellini and zucchini and continue simmering until tender, another 5-7 minutes. Taste and add salt and pepper as needed. Divide among serving bowls and top each portion with a spoonful of pesto and a sprinkling of Parmesan before serving.


Pin It!

Sunday, September 9, 2012

28 by 28: Homemade Ketchup


I made this homemade ketchup awhile back.  It is super easy and has a depth of flavor that is just AMAZING.  (I am semi-ashamed to admit that I ate a few warm spoonfuls straight from the pan!)  And best of all, it keeps in the fridge for up to 3 weeks, so you can enjoy it again and again.

Note:  The full 2/3 cup of brown sugar may make the ketchup a little too sweet if you prefer a tangier ketchup.  Try adding 1/2 cup in the beginning, then taste and add more if necessary about 30-45 minutes into cooking if you are concerned.

From Gourmet.com (Oh, how I miss Gourmet magazine!!!  *Tear*)

INGREDIENTS 
1 (28-oz) can whole tomatoes in purée 
1 medium onion, chopped 
2 tablespoons olive oil 
1 tablespoon tomato paste 
2/3 cup packed dark brown sugar 
1/2 cup cider vinegar 
1/2 teaspoon salt 

DIRECTIONS
1.  Purée tomatoes (with purée from can) in a blender until smooth.

2.  Cook onion in oil in a 4-quart heavy saucepan over moderate heat, stirring, until softened, about 8 minutes. Add puréed tomatoes, tomato paste, brown sugar, vinegar, and salt and simmer, uncovered, stirring occasionally, until very thick, about 1 hour (stir more frequently toward end of cooking to prevent scorching).

3.  Purée ketchup in 2 batches in blender until smooth (use caution when blending hot liquids). Chill, covered, at least 2 hours (for flavors to develop).


Pin It!

Sunday, August 12, 2012

28 by 28: Crispy Roast Chicken

Winner, winner, I've finally discovered the secret to a tasty chicken dinner!  


The chicken develops a flavorful, crisp skin thanks to a quick rubdown with salt and cornstarch prior to roasting.
 
As seen on The Teacher Learns to Cook, originally from Cook's Country
 
INGREDIENTS
1 whole roaster chicken (3 1/2 to 4 1/2 pounds), rinsed and patted dry
2 teaspoons cornstarch
2 teaspoons salt
2 pounds small potatoes, scrubbed and halved
2 teaspoons vegetable oil
 
DIRECTIONS
1.  Line roasting pan with foil.  Adjust oven rack to middle, place roasting pan on rack, and heat oven to 475 degrees.
 
2.  Combine cornstarch and salt in a small bowl.  Using a skewer or the tines of a fork, poke small holes all over the chicken skin.  Rub the cornstarch mixture evenly over the entire skin.
 
3.  Place the chicken wing-side up on the roasting rack, remove the roasting pan from the oven, place the rack with the chicken in the pan and roast for 15 minutes
 
4.  Carefully remove the pan and turn the chicken onto its other side (try using oven mitts, or wadded up towels to gently handle the chicken and turn it) and roast for 15 more minutes.  While the chicken roasts, toss the potatoes with the vegetable oil and a few pinches of salt.
 
5.  Remove the roasting pan from the oven after 30 minutes, take the rack with the chicken out of the pan and place it on a cookie sheet nearby.  Gather the tin foil by the corners and lift it out of the pan with all the grease and throw it away.
 
6.  Arrange the potatoes, cut-side down, in the pan.  Flip the chicken breast-side up and put it back in the roasting pan over the potatoes.  Place the roasting pan back into the oven and roast for about 20 more minutes, until a thermometer in the deepest part of the thigh registers 170 degrees. 
 
7.  Remove the chicken, pour any juices in the cavity over the potatoes, and rest the chicken upright on an angel-food cake pan insert or an empty soda can for about 15 minutes
 
8.  Toss the potatoes with the chicken juices (you may have to scrape a bit off the bottom of the pan if they are sticking) and roast for an additional 20 minutes or longer until they are as crisp and brown as you like them. 
 
Pin It!

Tuesday, July 24, 2012

Endless Summer Salad with Homemade Maple Vinaigrette


You just can't beat an entree salad as a weeknight meal.  This one is particularly special, with its crispy bacon pieces, feta cheese, and homemade maple dressing.  I've omitted measurements for the veg as people have their own preferences for salad proportions.

Oh, and my recent discovery that partially frozen chicken is WAY easier to slice than thawed has changed my world.  

Endless Summer Salad
An Ommy Noms original, shout-out to Oishii for helping me name it!
Serves 4

INGREDIENTS
Spring mix
Cherry tomatoes, cut in half
Sweet onion, several thin slices
2 granny smith apples, thinly sliced
1 cup walnuts (or you can go for almonds or sugared pecans if you'd like!)
2 oz feta cheese crumbles
2 boneless, skinless chicken breast, cut into bite-sized pieces
6 slices bacon, thinly sliced
Maple vinaigrette, recipe below

DIRECTIONS
1.  Heat a large nonstick skillet over medium high heat.  Add bacon and cook until fat begins to render out.  Add chicken pieces and cook in rendered bacon fat until browned and cooked through, flipping occasionally.

2.  Remove cooked chicken with a slotted spoon to a plate lined with paper towels.  Continue cooking bacon pieces until they reach desired level of crispness.  Remove to plate.

3.  Layer all ingredients in individual salad bowls and drizzle with maple vinaigrette.

Maple Vinaigrette
Adapted from Southern Living

INGREDIENTS
1/3 cup apple cider vinegar
1/4 cup maple syrup
1 tbsp dijon mustard
1/4 tsp salt
1/4 tsp pepper
1/2 cup good olive oil

DIRECTIONS
1.  Whisk together first five ingredients.  Gradually whisk in oil until fully incorporated.  Cover and refrigerate up to 3 days.

*  I tend to taste and adjust my dressings to suit my preferences.  I wound up adding more maple syrup in the end.


Pin It!

Monday, July 23, 2012

28 by 28: Enchiladas Verdes


I used to avoid green things at Mexican restaurants like the plague.  Guacamole?  Nuh uh.  Green dip?  No way.  Green enchiladas?  Not a chance.

Lucky for me, I've seen the light.  I can put back some serious green dip and order a plate of enchiladas verdes at pretty much every Mexican restaurant I visit.  It's a kind of test- like ordering lasagna at a new Italian place.  If the enchiladas verdes are good, the place is okay in my book.
 
I recently made some enchiladas of my own, and they passed with flying colors.  :)  I used some leftover cooked chicken in mine, though I've included the directions for poaching some raw breasts if you don't have any around.  (Also, I used queso quesadilla rather than queso fresco, so I popped mine in the oven for a few minutes to melt the cheese.  This step is unnecessary if you use a crumbling cheese.)

Adapted from Allrecipes


INGREDIENTS
2 boneless, skinless chicken breasts
2 cups chicken broth
1/4 white onion
1 clove garlic
2 teaspoons salt
1 pound fresh tomatillos, husks removed
5 serrano peppers
1/4 white onion
1 clove garlic
1 pinch salt
1 cup chicken broth
12 corn tortillas
1/4 cup vegetable oil
1 cup crumbled queso fresco
1/2 white onion, chopped
1 bunch fresh cilantro, chopped

DIRECTIONS
1. In a saucepan, combine chicken breast with chicken broth, one quarter onion, a clove of garlic, and 2 teaspoons salt. Bring to a boil. Reduce heat, cover, and simmer until cooked through, about 12-15 minutes. Set chicken aside to cool; discard onion and garlic. When cool enough to handle, shred chicken with your hands.

2. Place tomatillos and serrano chiles in a pot with water, enough to cover them. Bring to boil, and continue boiling until tomatillos turn a different shade of green (from bright green to a dull, army green). Strain tomatillos and chiles, and place in a blender with another quarter piece of onion, 1 clove garlic, a pinch of salt, and chicken broth. Blend until completely pureed. Pour salsa in a medium saucepan, and bring to a low boil.

3. Pour oil in a frying pan, and allow to get very hot. Slightly fry tortillas one by one in hot oil, setting each on a paper towel afterwards to soak some of the oil. Finally, dip slightly fried tortillas in low-boiling green salsa, until tortillas become soft again. Place on plates, 3 per person.

4. Fill or top tortillas with shredded chicken, then extra green sauce. Top with crumbled cheese, chopped onion, and chopped cilantro.


Pin It!

Thursday, July 19, 2012

Recipe Index

I am pleased to unveil my brand spankin' new Recipe Index!  (Woohoo!)  It's been a labor of love to say the least, but now you can enjoy a whole blog's worth of ommy noms at your fingertips. :-)  Check it out!


Pin It!

Spicy Crawfish Pasta


I first had this dish many, many years ago at a family gathering deep in the heart of Cajun country.  My mom wrote down the recipe and I always looked forward to its spicy, cheesy goodness when it was on the menu.

Last week, I set out to make crawfish etouffee but found myself fresh out of rice.  The wheels started turning when I spotted an unopened box of spaghetti hiding behind the flour.  I tweaked the original recipe to suit my cooking style, namely swapping a block of Velveeta for my favorite jack cheese.  It was as delicious as I remembered and tasted just as good for lunch the next day.  (Gotta love those dishes!)

Adapted from a family recipe

INGREDIENTS
4 tbsp butter
1 large onion, diced
1 green or red bell pepper, diced
3 stalks celery, sliced
2 cloves garlic, minced
2 tbsp flour
1 lb peeled crawfish tails (I buy the frozen packages and thaw them in cold water)
8 oz Monterrey jack or jalapeno jack cheese, shredded
1 1/2 cups half-and-half
2 tsp Cajun seasoning blend
Cayenne pepper, to taste
1 lb dry pasta (I typically use fettuccine or spaghetti)
1/2 cup shredded Parmesan cheese

DIRECTIONS
 1.  Melt the butter in a large skillet over medium heat. Cook onion, bell pepper, celery, and garlic in butter until onions are tender. Stir in flour, and cook for 5 minutes, stirring frequently. Add crawfish tails. Cover, and simmer for 15 minutes, stirring often.

2.  Reduce heat to low. Stir in the half-and-half, Cajun seasonings, and cayenne pepper. Cover, and simmer for about 10 minutes, stirring occasionally. Add shredded cheese a handful at a time, stirring well after each addition. After all cheese is added, continue to stir until melted.

3.  Meanwhile, bring a large pot of lightly salted water to a boil. Cook pasta in boiling water for 8 to 10 minutes, or until al dente; drain.

4.  Preheat oven to 350 degrees F (175 degrees C). Butter a 9x13 inch baking dish. Stir noodles into crawfish mixture; pour into prepared dish, and sprinkle with Parmesan cheese.

5.  Bake in a preheated oven for 20 minutes, or until hot and bubbly.

Pin It!

Monday, July 9, 2012

28 by 28: Chocolate Milk Mix


Chocolate milk mix was the one item on my 28 by 28 list that I expected to whip out in 2 seconds and call it good.  I even felt a little funny including it on any sort of bucket list, but I figured it wouldn't hurt to have a couple of easy fillers.  Let's just say it wasn't as easy as I anticipated.

Things I learned while attempting to make homemade chocolate milk:
1.  Cookies-and-cream milk = milk-and-Oreo-sand
2.  Cocoa powder does not incorporate into milk.
3.  Neither does dutch-process cocoa powder.
4.  Not even if you use powdered sugar instead of regular.
5.  Cocoa powder WILL incorporate if it is microwaved in a small amount of milk or water.
6.  Who wants to do that?!

It was a long road, but this final iteration is wonderful- a silky chocolate syrup that stirs into a cold glass of milk with ease. The original recipe called for semi-sweet chocolate, but I opted for milk chocolate instead. 

From Tasty Kitchen

INGREDIENTS
1 cup heavy cream
4 oz quality semi-sweet or milk chocolate chocolate pieces

DIRECTIONS
1.  Heat cream over medium-high heat until it begins to boil. 
2.  Remove from heat and add chocolate pieces.  Whisk until chocolate is melted and mixture is fully combined.
3.  Store in the refrigerator for up to two weeks. 
4.  Stir 2-3 tablespoons of the mixture into cold milk to make chocolate milk.  Add to hot milk for hot chocolate.


Pin It!

Tuesday, July 3, 2012

28 by 28: Panna Cotta


I included Panna Cotta on my 28 by 28 list because I thought it looked intriguing.  I had never actually tried it before, so I was a little concerned that it would come out tasting like cream-flavored Jell-o.  Thankfully, that wasn't the case!  It's basically an eggless custard that is so smooth, rich, and creamy you won't be able to get enough of it. 

With such a simple ingredient list, it's important to be mindful of freshness and quality.  According to Mark Bittman, you can freeze the leftovers and thaw them for 20 minutes before serving for more of a Philadelphia-style ice cream consistency and flavor.

And don't sweat if you don't have custard cups- I used a muffin tin.  : )

From Mark Bittman, via the New York Times

INGREDIENTS

3 cups cream, or 1 1/2 cups cream and 1 1/2 cups half-and-half
1 envelope (1/4 ounce) unflavored gelatin
1 teaspoon vanilla extract (or to taste) or 1 vanilla bean
1/2 cup sugar

DIRECTIONS
1. Pour 1 cup cream in a medium saucepan and sprinkle gelatin over it; let sit for 5 minutes. Turn heat to low and cook, stirring, until gelatin dissolves completely.

2. If using vanilla extract, add remaining cream and sugar to gelatin mixture and heat gently, just until sugar dissolves; add vanilla and proceed to Step 3. If using vanilla bean, cut it in two, lengthwise. Scrape out seeds; add seeds and bean pod to pot, along with the sugar and remaining cream. Cook over medium heat, stirring, until steam arises. Turn off heat, cover, and let steep for 15 to 30 minutes.

3. Remove vanilla bean, if you used it. Pour mixture into 4 large or 6 small custard cups. Chill until set, about 4 hours. Serve in cups, or dip cups in hot water for about 10 seconds, then invert onto plates. Serve within 24 hours.

Pin It!

Saturday, June 23, 2012

28 by 28: Panzanella


It's no secret that I'm a tomato fiend. I'll eat tomatoes plain with salt and pepper or stacked high on sandwiches, hamburgers, wraps, you name it. My husband, on the other hand, is not a fan. This usually serves me well, as I get his castaways to add to my own grub. (Score!) The game changed this week, though, with the gift of farm-fresh tomatoes from my dear in-laws. He's been snacking on them like nobody's business! I decided this afternoon that, if I was going to knock out the panzanella on my 28 by 28 list, I'd better act fast. It was delicious! Light and refreshing, the addition of the balsamic vinegar and basil transformed a standard tomato salad into something special.

Adapted from Simple Recipes

INGREDIENTS
4 cups tomatoes, cut into large chunks
4 cups day old crusty bread*, cut into large chunks
1 cucumber, peeled and sliced
1/2 red onion, thinly sliced
1 bunch fresh basil, stems removed
1/4 cup good olive oil
1/4 cup balsamic vinegar
Salt and pepper to taste


DIRECTIONS
1. Chiffonade the basil. (Stack the basil leaves on cutting board. Roll tightly and slice into thin strips.)

2. Combine all ingredients in a large bowl. Allow to marinate, covered, at room temperature for 30 minutes to an hour.

3. Serve at room temperature.

* If you don't have hard old bread sitting around, you can take fresh crusty bread, cut it into big cubes, lay the cubes out on a baking sheet, and place in a 300°F oven for 5-10 minutes, until the outer edges have dried out a bit (not toasted, just dried). If you use fresh bread without doing this, the bread will turn to mush in the salad.

Pin It!

Sunday, June 17, 2012

SoCo Cherry Cordials for Dad


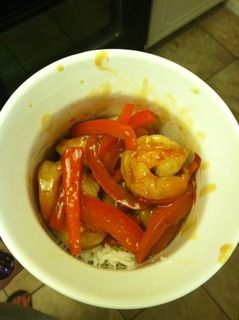
My dad doesn't eat many sweets, but he can't seem to resist the Queen Anne Cherry Cordials that come out around Christmastime.  I whipped up a batch of homemade cherry cordials to bring him for Fathers' Day, and boy are they delicious!  I opted to bathe my cherries in a bit of Southern Comfort, but you can choose any liquor you like. 

Things I learned by making chocolate cherry cordials:

- Some food is just magical! I was skeptical, but the thick fondant really did liquify, and within a day at that.
- Fondant burns hurt like you would not believe. I'm currently nursing a wicked blister on my right pointer finger, which has made note-taking a little more challenging than usual.
- Scraping fondant is quite the workout!

And a few notes: 
-  I could not find maraschino cherries with stems, so I dipped my cherries with a toothpick.
-  It helps to have an extra set of hands around during the fondant-working and chocolate-dipping stages.
-  You will get tired while working the fondant.  It's okay to take a break! 
-  I found these pictures of the fondant-making process very helpful, although this recipe produces a fondant with a pink hue due to the inclusion of cherry juice.  (Remember, it's okay to take a break!)
-  The longer you soak your cherries, the stronger a liquor flavor they will have.  I soaked mine for two hours and the flavor comes through well but is not overpowering.
-  Make sure that there are no holes in your chocolate covering, or the liquified fondant will leak out.  You may find it necessary to remelt some chocolate and fill in some gaps as they dry.
 
From Serious Eats

INGREDIENTS

To soak the cherries:
24 maraschino cherries with stems
3 tablespoons Southern Comfort, or liquor of choice

For the Fondant:
1 cup granulated sugar
1/3 cup water
4 tablespoons liquid from maraschino cherry jar
1 tablespoon light corn syrup

To Dip the Cherries:
8 ounces bittersweet chocolate, finely chopped

DIRECTIONS
1. Place cherries in small bowl with liquor. Cover and rest two to twelve hours, stirring occasionally.

2. Place cherries on paper towel lined pan to dry, standing each cherry upright. In small saucepan, combine sugar, water, cherry juice, and light corn syrup. Cook over medium heat, stirring to dissolve sugar. When mixture comes to boil, stop stirring and continue to cook until mixture registers 240°F on instant read thermometer, occasionally brushing edge of pan with water to dissolve crystals.

3. Pour sugar syrup onto a rimmed baking sheet set over a towel, and let cool until just barely warm, about 25 minutes. Using a pastry scraper (or sturdy metal spatula!), scrape syrup up and over itself. Continue this motion while moving mass of thickened syrup back and forth across pan. Syrup will begin to thicken as it cools. Use offset spatula or to remove buildup from pastry scraper as needed. Continue working fondant until mixture begins to turn from translucent to opaque, about 15 minutes.

4. Continue to work mixture back and forth across baking sheet until it begins to thicken considerably, to the point of becoming a thick paste, about 15 minutes more. Transfer fondant to small saucepan and set over low heat, stirring until just melted. Remove from heat.

5. Line baking sheet with parchment paper and set aside. Holding cherry by the stem, dip in fondant to coat, and set on prepared sheetpan. Remelt fondant if it thickens before cherries are finished being dipped. Let fondant dry onto cherries, about 10 minutes.

6. Place chocolate in heatproof bowl set over pan of barely simmering water. Stirring gently, heat until about half of chocolate is melted. Remove bowl from heat and continue to stir chocolate until completely melted.

7. One by one, dip fondant covered cherries in chocolate, covering completely and then allowing excess chocolate to drip from cherry. Set each cherry back on parchment lined sheetpan. Chill at least 48 hours before serving.  As the cordials chill, the fondant will liquify into a sweet syrup.

 
Pin It!

Thursday, June 14, 2012

Pork Florentine


It's swap time again!  This time, I was paired up with Joelen over at What's Cookin' Chicago.  I knew exactly what I would make when I got my match- I had been drooling over this pork florentine dish since it crossed my Google Reader a few weeks ago.  I was not disappointed!  The flavorful sauce was the perfect accompaniment to seared chops and mashed potatoes.  (And the inclusion of all that spinach surely takes away some of the cream-induced guilt!)

As always, thank you to A Taste of Home Cooking for hosting another wonderful swap!

From What's Cookin', Chicago?, originally from America's Test Kitchen

INGREDIENTS
1/4 cup olive oil
1 1/2 pounds baby spinach
1 1/2 pounds pork chops (about 4-6)
1 onion, minced
2 tablespoons all purpose flour
4 garlic cloves, minced
2 cups low sodium chicken broth
1 cup heavy cream
pinch of freshly ground nutmeg
1/2 cup Parmesan cheese, grated

DIRECTIONS
In a 12 inch skillet, heat 1 tablespoon of oil over medium high heat. Add the spinach in four batches to the skillet and cook down until all the spinach is wilted and decreased in volume by half. Transfer the spinach to a colander and press through any excess liquid. Place spinach onto a cutting board and coarsely chop. Return the chopped spinach to the colander and press through any excess liquid again; set aside.

Pat the pork chops dry with paper towels and season with salt, pepper and garlic powder. Heat 1 tablespoon in the now empty skillet over medium high heat until smoking. Cook the seasoned pork chops in batches and brown on each side, cooking until the internal temperature reaches 150 degrees. Transfer the cooked pork chops to a warm plate and tent with foil to keep warm.  (The internal temperature will continue to rise once the chops are off the heat.)

In the now empty skillet, add the remaining 1 tablespoon of oil over medium high heat. Add the onions and cook until softened. Add the flour and garlic and cook until fragrant. Slowly add the broth and heavy cream, stirring constantly. Add 1/4 teaspoon salt, 1/4 teaspoon pepper and nutmeg and simmer until sauce thickens up. Remove from heat and stir in 1/4 cup Parmesan and spinach to create the sauce.

To serve, plate the pork and top with the Parmesan spinach sauce.

Pin It!

Spinach Strawberry Salad with Homemade Raspberry Vinaigrette


I'm sorry I left y'all hanging with my other post!  This salad just screams summer.  From the fresh strawberries to the tangy vinaigrette, you won't be able to get enough!  I didn't include measurements for the salad- we just eyeballed it.


Summery Spinach Salad

INGREDIENTS
Baby spinach
Sliced fresh strawberries
Cooked, cubed chicken
Crispy bacon pieces
Sugared pecans
Homemade raspberry vinaigrette, recipe to follow

Raspberry Vinaigrette
Adapted from The Taste of Home Cookbook

INGREDIENTS
1/2 cup raspberry vinegar
1 tbsp white sugar
1/2 cup olive oil
1/2 tsp dijon

1 tbsp minced shallot
1 clove garlic, minced
 Dash pepper

DIRECTIONS
 1.  Combine all ingredients in a medium bowl.  Whisk well to combine.  Refrigerate until serving.


Pin It!

Monday, June 4, 2012

Sugared Pecans

After a hectic week of preparations, school is out for summer!  There's no feeling quite like that first Monday morning you wake up and realize you've got nowhere to be.  :-)  I plan to throw myself at several cooking and sewing projects over the next two and a half months, so stay tuned!


Speaking of cooking, let's talk about today's treat!  Maybe it's just a southern thing, but it seems like every mall, craft show, gun show, carnival, and holiday market has at least a couple peddlers stirring giant vats of candied pecans.  The aroma usually hits my nose about two steps in, and I find myself turning out my pockets and digging in my purse for loose change.


I cooked up some sugared pecans of my own this afternoon, and I'm proud to say they were just as delicious as any I've had out.  Be sure to come back tomorrow, as I'll be sharing a dinnertime recipe featuring these little guys.

From Southern Food

INGREDIENTS
1 egg white
1 cup brown sugar
1 tablespoon flour
1/8 teaspoon salt
1 teaspoon vanilla extract
3 cups pecan halves

DIRECTIONS
Beat egg white until foamy; slowly beat in the brown sugar and flour. Add salt and vanilla flavoring, then fold in pecans. Transfer pecans to a greased baking pan and bake at 250° for about 45 minutes.


Pin It!

Monday, May 28, 2012

Baked Pancake (Dutch Baby)


I realized this morning that I've never shared this delightful breakfast dish with you- shame on me!  A few months ago, I got tired of the standard Cheerios-and-milk shtick and set out in search of breakfast items that could either be A) cooked ahead of time or B) thrown together so quickly that it doesn't disrupt my morning routine.  Baked pancakes, aka Dutch babies, actually fit both of those requirements! 

Subtly sweet, the dish is substantial enough to last you all morning.  I like to enjoy a slice with fresh fruit and a drizzle of maple syrup.

Adapted from Allrecipes

INGREDIENTS

3 eggs
1/2 tsp salt
1/2 cup all-purpose flour
1/2 cup milk
1-2 tbsp butter, for greasing the pan
Confectioners' sugar, syrup, and/or fresh fruit for topping


DIRECTIONS
1.  In a medium bowl, whisk eggs until very light. Add salt, flour and milk; whisk well. 
2.  Thoroughly rub bottom and sides of a 10-in. cast-iron or heavy skillet with butter. Pour batter into skillet. 
3.  Bake at 450 degrees F for 15 minutes. Reduce heat to 350 degrees F and bake 5 minutes more, or until set. 
4.  Garnish as desired.  Slice and serve immediately.

 
Pin It!

Sunday, May 13, 2012

Chocolate Sour Cream Bundt Cake with Chocolate Ganache

she
answers by the second ring
is
quilter, baker, meatloaf-maker
my
Encourager, no matter what
Mom

Happy Mothers' Day to all the moms out there, but especially to my own.  

Now go bake yours some cake.  She deserves it.  :-)

Adapted from Leite's Culinaria, originally from Bi-Rite Market's Eat Good Food

INGREDIENTS
For the cake:
1 cup (2 sticks) unsalted butter, plus more for the pan
1/3 cup cocoa powder
1 tsp salt
1 cup water
2 cups all-purpose flour, plus more for hte pan
1 3/4 cups sugar
1 1/2 tsp baking soda
2 large eggs
1/2 cup sour cream
1 tsp vanilla

For the ganache:
4 oz bittersweet chocolate, finely chopped
3 tbsp white sugar
1/2 cup heavy cream

DIRECTIONS
Make the cake:
 1. Position a rack in the center of the oven and heat to 350°F (176°C). Butter and flour a 10- or 12-cup Bundt pan and set aside.
2. In a small saucepan, combine the butter, cocoa powder, salt, and water and place over medium heat. Cook, stirring, just until melted and combined. Remove from the heat and set aside.
3. Place the flour, sugar, and baking soda in a large bowl and whisk to blend. Add half of the melted butter mixture and whisk until completely blended (the mixture will be quite thick). Add the remaining butter mixture and whisk until combined. Add the eggs, one at a time, whisking until completely blended before adding the next egg. Whisk in the sour cream and vanilla until smooth.
4. Scrape the batter into the prepared pan and bake until a toothpick inserted into the center of the cake comes out clean, 40 to 45 minutes. Let the cake cool in the pan for 15 minutes and then invert onto a rack. Let cool completely before glazing.
Make the ganache:
5. Just before glazing the cooled cake, place the chopped chocolate in a medium bowl and set aside. Combine the heavy cream and sugar in a small saucepan and put over medium heat. Stir constantly until the cream is hot and the sugar is dissolved. Pour the hot cream over the chocolate and whisk until melted and smooth. If the glaze is exceptionally runny, let it sit for a minute or so to thicken.
6. Drizzle the ganache over the cooled cake, allowing it to drip down the sides.

Pin It!

Friday, May 4, 2012

Caramelized Onion Dip for the Swap!


It's blog swap time!  I was paired up with Oishii Food again this round, and I couldn't have been happier.  (After all, her crispy chicken wontons, sizzling hot shrimp, and crispy oven-fried onion poblano rings have been huge hits around here!)

I was pretty dead set on making her blueberry cupcakes, but then I came across this caramelized onion dip at the 9th hour and just had to have it.  I've always been a fan of french onion dip mix but never cared for the eight million and two grams of sodium that came along with it.  This homemade version was so packed with sweet oniony goodness that I'll never go back to the packets.

I took some liberties with the original recipe, namely upping the onion-to-dip ratio and substituting Greek yogurt for the sour cream.  It's teacher appreciation week and our awesome PTO has been graciously supplying us with a full meal plus a dessert spread everyday- I needed to save some calories.  :-)

Adapted from Oishii Food, originally by Alton Brown

INGREDIENTS
2 tbsp olive oil
2 large onions, diced or thinly sliced (I couldn't decide, so I diced one and sliced the other)
2 tsp brown sugar
1/4 tsp salt
1 3/4 cups Greek yogurt or sour cream
1/2 cup mayonnaise
1/4 tsp garlic powder
Salt and pepper to taste

DIRECTIONS
1.  Heat the oil in a saute pan over medium heat.  Add the onions and salt and cook until beginning to soften, about 5 minutes.  Add the brown sugar.  Cook until caramelized, stirring often, about 20 minutes.  Remove from heat and allow onions to cool.

2.  In a medium bowl, combine the sour cream, mayonnaise, garlic powder, salt, and pepper.  Add the cooled onions and stir to combine.  Refrigerate until ready to serve.  (I found the dip was even tastier after an overnight stay in the fridge.)

As always, a big thanks goes out to A Taste of Home Cooking for hosting these wonderful swaps!


Pin It!

Thursday, May 3, 2012

What's been cooking...

I haven't been in the kitchen much, but here's a sampling of what I've been "cooking up"-

 
Graduate portfolios

 
Baby figs


Salad greens (complete with 24-hour guard)


And an iPhone pouch!  (Pattern adapted from During Quiet Time)

I haven't fallen off the face of the planet, though I *have* been crazy busy.  Stay tuned, because tomorrow I'll be sharing a hit appetizer for your next get-together!


Pin It!

LinkWithin

Related Posts Plugin for WordPress, Blogger...