I'm going to take a momentary detour away from foodage to show you what I've been cooking up all week! I changed classrooms this year and have finally got everything *mostly* set up. Enjoy!
This is the right side of my classroom, just inside the door. The short tables will be our writing center, and I got mini mailboxes from Goodwill so the kids can write letters to one another.
This is my classroom library! I rescued that bookcase from the trash last year and painted it. I've still got lots of books in the cabinets, but this will get the kids started on learning how to put them in the correct baskets. To your left is the listening/Leappad center and a colorful student work display.
The little bookshelf will be used to house students' independent browsing boxes. I made the curtains for my horseshoe table and teacher desk last year and draped some extra fabric over the bulletin board to cover its yellowy ugliness. My time-out table (aka the Chill Chair) is to the left of the bookcase.
This will be our word wall. Mom helped me out early this week by hanging LOTS of border for me. (Thanks Mom!)
This is the front of the room. My calendar stuff will all be set up off to the right, but I don't have everything checked out to me yet.
This will be the gallery for all those wonderful masterpieces the kids bring for me!
Tuesday, July 12, 2011
Monday, July 11, 2011
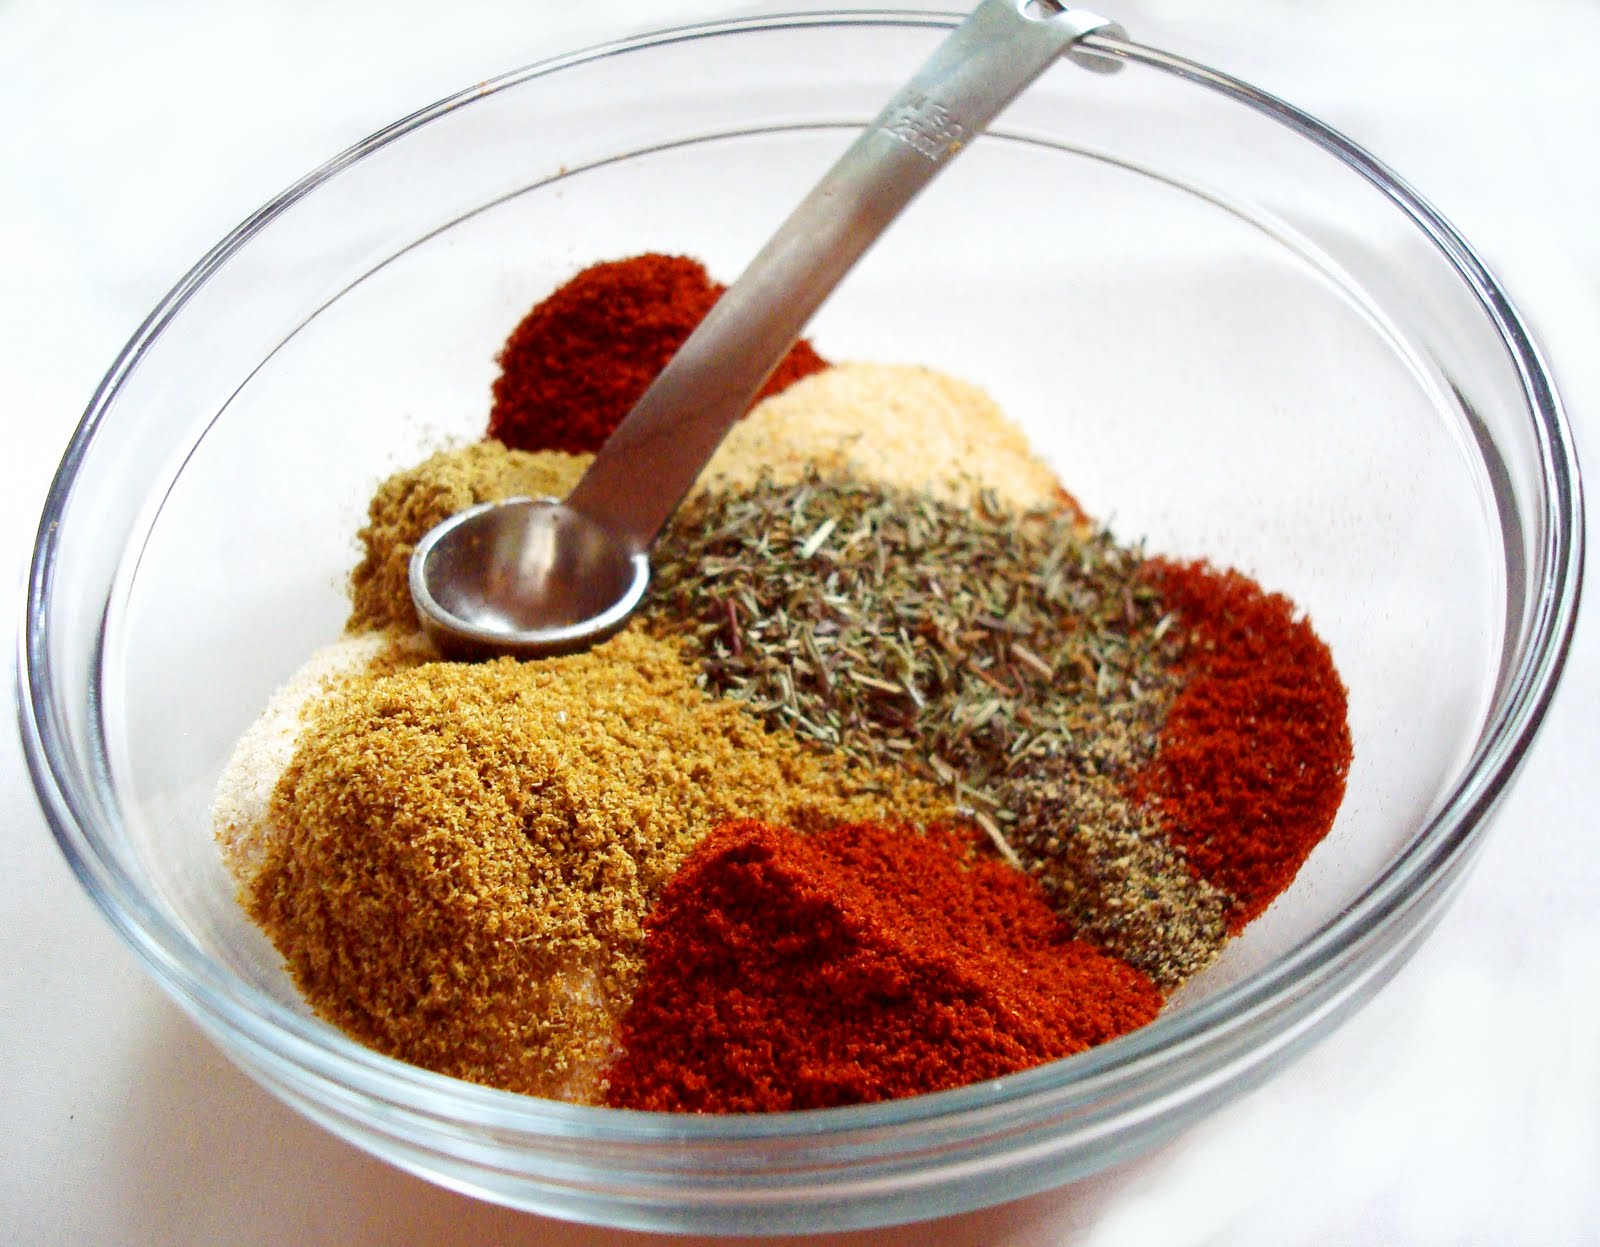
Blackening Mix
Summertime during childhood usually meant day trips to Galveston. After a stroll down Seawall Boulevard, we always made a beeline straight for Gaido's Seafood. Now, Gaido's is kind of a fancy-pants restaurant to a kid, but I certainly didn't mind. I'm still convinced that foodie heaven lies somewhere amidst the skewers of blackened shrimp and the thick slices of parmesan-crusted green tomatoes.
I haven't been to Gaido's in years, but I caught a craving for blackened-anything last week. I whipped up a batch of blackened chicken using this flavorful homemade rub. It was delicious, and I can't wait to try it with shrimp!
Blackening mix adapted from About.com
INGREDIENTS
1 tbsp paprika
1 tsp chili powder
1 tsp onion powder
1 tsp garlic powder
1/2 tsp thyme
1/2 tsp oregano
1 tsp salt
1/2 tsp black pepper
1/2 tsp sugar
DIRECTIONS
1. Combine spices in a small bowl and mix well. Store in an airtight container.
Blackened chicken adapted from Allrecipes
INGREDIENTS
4 boneless, skinless chicken breasts
1 1/2 tbsp blackening mix
1 tbsp olive oil
DIRECTIONS
1. Preheat oven to 350 degrees. Pound chicken breasts to an even thickness. Pat dry and sprinkle with blackening mix on both sides.
2. Pour olive oil in a nonstick, oven-safe skillet. Heat over medium-high until shimmering but not smoking. Add chicken breasts and sear, about 3 minutes per side.
3. Place skillet in the preheated oven and bake until internal temperature is 165 degrees, 15-20 minutes.
I haven't been to Gaido's in years, but I caught a craving for blackened-anything last week. I whipped up a batch of blackened chicken using this flavorful homemade rub. It was delicious, and I can't wait to try it with shrimp!
Blackening mix adapted from About.com
INGREDIENTS
1 tbsp paprika
1 tsp chili powder
1 tsp onion powder
1 tsp garlic powder
1/2 tsp thyme
1/2 tsp oregano
1 tsp salt
1/2 tsp black pepper
1/2 tsp sugar
DIRECTIONS
1. Combine spices in a small bowl and mix well. Store in an airtight container.
***************************
Blackened chicken adapted from Allrecipes
INGREDIENTS
4 boneless, skinless chicken breasts
1 1/2 tbsp blackening mix
1 tbsp olive oil
DIRECTIONS
1. Preheat oven to 350 degrees. Pound chicken breasts to an even thickness. Pat dry and sprinkle with blackening mix on both sides.
2. Pour olive oil in a nonstick, oven-safe skillet. Heat over medium-high until shimmering but not smoking. Add chicken breasts and sear, about 3 minutes per side.
3. Place skillet in the preheated oven and bake until internal temperature is 165 degrees, 15-20 minutes.
Adventure
I've got lots of good stuff to share with y'all in the coming days, but here's a little something to tide you over. A couple of months ago, I bought a lovely little poblano plant at Lowe's. It's now about four feet tall and has yet to produce a single pepper. I walked outside this morning and saw that it's officially covered with blooms- wahoo!
But I also met this little guy.
Now, if you knew me in real life, you'd know that I'm terrified of spiders, and pretty much any other creepy-crawly thing. I'm talking scream-at-the-top-of-my-lungs-break-out-into-hives-and-burst-into-tears scared. But this little guy was neat. His body was translucent, and he was waving his front legs all around. I decided to get a little closer so that I could take an awesome macro picture of his eyes. Are you ready to see the shot?
Are you sure?
Here goes nothing...
But I also met this little guy.
Now, if you knew me in real life, you'd know that I'm terrified of spiders, and pretty much any other creepy-crawly thing. I'm talking scream-at-the-top-of-my-lungs-break-out-into-hives-and-burst-into-tears scared. But this little guy was neat. His body was translucent, and he was waving his front legs all around. I decided to get a little closer so that I could take an awesome macro picture of his eyes. Are you ready to see the shot?
Are you sure?
Here goes nothing...
..."Why Lauren," you might say, "those spider eyes look an awful lot like a tree and the roof of your house!"
Yeah. That's because the little turd decided to JUMP ON ME. I screamed like a little girl and ran into the house. But there were no tears this time.
Okay, maybe just one.
Wednesday, July 6, 2011
Oatmeal-Brown Sugar Muffins
I woke up yesterday morning with
I sprung for a mix-in of dried blueberries and pecans, but you can choose anything your little heart desires. Even chocolate. (I won't tell!)
Adapted from Allrecipes
Makes 12 muffins
Note about cook time: I checked my muffins after 14 minutes, and they were done. I've left the original cook time in the recipe (in case my oven was running too hot), but you may want to check them early.
INGREDIENTS
1 cup quick-cooking oats
1 cup buttermilk
1/2 cup packed brown sugar
1 egg, beaten
1/4 cup vegetable oil
1/2 cup mix-in of your choice, optional
1 cup all-purpose flour
1 teaspoon baking powder
1/2 teaspoon baking soda
1/2 teaspoon salt
DIRECTIONS
1. Preheat oven to 400 degrees. In a medium bowl, combine oats, milk, and brown sugar. Let stand for 15 minutes. Stir in egg, oil, and mix-in.
2. In a separate bowl, combine flour, baking powder, baking soda and salt. Stir into oat mixture until just moistened.
3. Fill a greased muffin tin or paper-lined muffin cups three-fourths full.
4. Bake until a toothpick inserted into the center of a muffin comes out clean, about 16-18 minutes. Cool in pan 5 minutes before removing to a wire rack.
Monday, July 4, 2011
Spicing things up!
Hey y'all! I have some super exciting news to share with you, but first, I want to let you know about a couple changes I've made to the blog. In the right side bar, I've put a link to Ommy Noms' very own RSS feed, along with a search box so you can easily find a new favorite. (Bretzel rolls, anyone?)
And now, onto the news!
I am very happy to announce that I've been featured on one of my favorite foodie blogs as a guest blogger! Many thanks to Jessica for being a wonderful hostess. Visit The Novice Chef to find out how I made these delicious oven-fried poblano rings!
And now, onto the news!
I am very happy to announce that I've been featured on one of my favorite foodie blogs as a guest blogger! Many thanks to Jessica for being a wonderful hostess. Visit The Novice Chef to find out how I made these delicious oven-fried poblano rings!
Wednesday, June 29, 2011
Fig Leather
Mom likes to say that my generation has it easy when it comes to research projects. Gone are the days of sitting in a shadowy microfiche room, searching, squinty-eyed, for a hidden gem. Now, we can access all manner of articles with the click of a mouse.
Sorry to tell you, Mom, but research just got even easier. Thanks to the wonderful world of Google Books, I am (almost) done with my first grad school term paper. I've used this nifty site to access dozens of professional books, many of which are out of print.
So what does my research paper have to do with food? Well, I can only look at online textbooks for so long before my brain begins to wander. I've had figs on my mind lately, and decided I'd poke around Google Books to see if there were any books about them. Jackpot! I found a USDA bulletin from 1921 called Fig Growing in the South Atlantic and Gulf States. Inside, I found several suggestions for preserving figs, but one method in particular- fig leather, caught my eye. I went straight to the kitchen and got to work. The product was amazing- a mildly sweet Fruit Roll-up for adults, full of figgy flavor.
Adapted from Fig Growing in the South Atlantic and Gulf States
INGREDIENTS
2 cups fresh figs, washed and stems removed
1 tbsp powdered sugar
DIRECTIONS
1. Line a baking sheet with heat-safe plastic wrap or parchment paper and set oven to "warm".
2. Puree figs in a food processor. Spread fig puree onto plastic wrap (or parchment paper) in a very thin layer.
3. Place baking sheet in the warm oven. Remove when fruit leather is fully dehydrated and peels off in a single sheet, about 10-12 hours. (Leather may be slightly tacky to the touch.)
4. Separate fig leather from cooking surface. Sprinkle with powdered sugar and roll up like a jelly cake. Slice into serving-size pieces and store in an air-tight, moisture proof container.
Monday, June 27, 2011
Squash Casserole
I'll admit it, I'm a creature of habit. If squash casserole is on the menu, I'm ordering it. I don't even care whether it "goes" with my entree. Baked chicken + squash casserole? Awesome. Pizza + squash casserole? Sweet! Sushi + squash casserole?
Well... I guess I do have my limits.
Anyway, my grandparents sent me home with a bag full of freshly-picked squash a couple of days ago and I knew just what I wanted to make. This casserole hit the spot- crushed Ritz crackers were the perfect topping to all that cheesy squash-y goodness. Try it, you'll like it. :)
Adapted from Paula Deen
Serves 6
INGREDIENTS
6 cups diced yellow squash (about 6 medium squash)
1 tbsp vegetable oil
1 large onion, chopped
4 tablespoons butter
1/2 cup sour cream
1/2 tsp salt
1/4 tsp pepper
1/4 tsp garlic powder
1 cup grated cheddar cheese
1 cup crushed Ritz crackers
DIRECTIONS
1. Preheat oven to 350 degrees.
2. In a large nonstick skillet, heat oil over medium-low until shimmering but not smoking. Add squash and saute until it is very soft, about 15 to 20 minutes. Drain any accumulated liquid and place cooked squash pieces in a large bowl.
3. Add butter and onion pieces to skillet and return to heat. Saute for five minutes. Add cooked onion, sour cream, cheese, and seasonings to the bowl and stir to combine.
4. Place squash mixture in a buttered casserole dish and top with cracker crumbs. Bake for 25-30 minutes until casserole is piping hot and lightly browned.
Saturday, June 25, 2011
Cucidati (Sicilian Fig Cookies)
I like picking figs. I like rain.
I do not like picking figs in the rain.
On a stepladder. (I know!)
Our backyard figs started ripening this week, which is a much-celebrated event in the Ommy Noms household. The first thing I did after eating
Last year, my filling was a little runny, so it was hard to keep all the fabulous figginess inside the cookie. I decided to partially dehydrate my figs this year to counteract that problem. I simply measured out three cups of figs, cut them each in half, and put them cut-side down on a cookie sheet. I set my oven to "warm" and slipped those bad boys right in. After three hours, they were perfect. My filling was gloriously thick this time around, and the cookies were much easier to keep intact. (The dehydration process also served to intensify the sweetness of the fruit, so I didn't need to add any sugar to the filling.)
I'm sharing the recipe in its original state, because it's so hard to find a cookie recipe that calls for fresh figs. If you follow the original recipe, make sure to cook down the filling until it's very thick. Otherwise, feel free to follow my modifications above.
Fig Cookies
Adapted from Melinda Lee, original source unknown
Makes about 3 dozen cookies
INGREDIENTS
For the cookie dough:
3 cups flour, sifted
1/2 tsp salt
1/2 tsp cinnamon
2/3 cup butter, room temperature
1/2 cup dark brown sugar, firmly packed
1/2 cup light brown sugar, firmly packed
2 3gg whites
1 tsp vanilla
For the filling:
3 cups fresh figs, finely chopped ***
1 tbsp orange liqueur
1 tbsp sugar
1 tbsp fresh lemon juice
DIRECTIONS
To make the dough:
1. Cream the butter and sugars in a medium bowl until very fluffy. Beat in the egg whites and vanilla. Add the cinnamon and salt. Add the flour 1 cup at a time, stirring after each addition. Mix until well-incorporated.
2. Wrap the dough in plastic wrap and chill it in the refrigerator for 2-3 hours. Meanwhile, prepare the fig filling.
To make the filling:
1. Simmer the filling ingredients together until thickened, stirring frequently, about 5 to 7 minutes. Cool but do not chill.
To compose and bake cookies:
1. When the dough has chilled, preheat the oven to 350.2. Roll out the dough, a small portion at a time, 1/4-inch thick. Cut into pieces about 2 1/2 inches wide and 3 inches long. Place a level teaspoon of the fig mixture in the center of each piece of dough, and fold the dough around the filling as though folding a business letter. Flatten the cookies slightly and place them seam-down, 1 inch apart, on ungreased baking sheets.
3. Bake about 12 minutes, until cookies are lightly browned and just firm. Cool on racks. Top with orange liqueur glaze and sprinkles if desired.
***If fresh figs are unavailable, substitute 2 cups of finely chopped dried figs and add 3/4 cup of orange juice or water to the filling mixture prior to simmering.
Orange Liqueur Glaze
An Ommy Noms original
INGREDIENTS
1 cup powdered sugar
1/2 tsp orange liqueur
2 tbsp milk
DIRECTIONS
Combine powdered sugar, orange liqueur, and milk in a small bowl. Whisk so that no lumps remain. Glaze should be pourable, but not runny. If your glaze is too thick, add milk in small increments until desired consistency is reached.
Wednesday, June 22, 2011
Three-Year Anniversary
Three years ago today, my husband and I were married. I put together a Google Search Story for him to commemorate the occasion.
It's been a busy three years- we've bought a house, had it half-destroyed by a hurricane, adopted a precious little dog, and learned to cook from the ground-up. I wouldn't change a thing. :)
Tuesday, June 21, 2011
Cornflake Chicken Tenders with Homemade Honey Mustard
I'm going to let you in on a little secret. (But only because I like you so much.) I... well, I've never been very good at following directions. In grade school, I "earned" many a 50 because I completed one side of a worksheet beautifully but never bothered to turn it over.
And remember those "let's see if you're really following directions" activities? Killer. You'd get a mile-long list of short-answer questions, but the little paragraph at the top would say "Skip to number six trillion and two, and keep it to yourself." The teacher always reminded us to read the instructions before starting, but do you think I listened? No. I'd practically give myself carpel tunnel trying to answer all the questions before the the timer went off. And just as I'd sit up to wipe the sweat from my brow, I'd notice old Joe Blow kicked back in the corner with a smirk on his face and realize I'd been had.
I fell for it every.single.time.
I'd like to say that I've gotten better in my old age, but I haven't. Like when I made these cornflake-crusted chicken tenders- I cooked them on a regular cookie sheet, even though the directions clearly say to bake them on a rack inside of a cookie sheet. Ah, well. They were still very tasty, even if they *weren't* quite as crispy as they were supposed to be.
I served them up with some homemade honey mustard, which was amazingly awesome. I think my husband's exact words were, "You could practically dunk dog crap in this stuff and it'd taste delicious." I wouldn't go quite that far, but it's definitely a keeper.
Chicken Tenders
As seen on What's Cookin, Chicago?; Originally from Pennies on a Platter
Serves 4
INGREDIENTS
4 boneless skinless chicken breasts, cut into 1-inch strips
1/4 cup flour
1 teaspoon garlic powder
1 teaspoon onion powder
1/2 teaspoon salt
1/4 teaspoon freshly ground black pepper
8 tablespoons (1/2 cup) butter, melted
2 cups finely crushed corn flakes cereal
DIRECTIONS
1. Adjust an oven rack to the middle position and heat the oven to 400˚F. Place an oven-safe cooling rack on a baking sheet and set aside.
2. Combine the flour and spices in a small bowl; set aside. Place melted butter in another small bowl; set aside. Place the crushed cereal in a medium-sized bowl or pie plate.
3. Dip the chicken pieces in the seasoned flour, then the butter, then the cereal. Place the coated chicken strips on the rack in the baking sheet.
4. Bake the coated chicken pieces in the preheated oven for 20 – 25 minutes, until chicken is no longer pink. Serve with your favorite sauce.
Homemade Honey Mustard Dipping Sauce
An Ommy Noms Original
Serves 4
INGREDIENTS
2 Tbsp mayonnaise
2 Tbsp Dijon mustard
3 Tbsp honey
DIRECTIONS
1. Combine all ingredients in a small bowl. Refrigerate for at least one hour before serving.
And remember those "let's see if you're really following directions" activities? Killer. You'd get a mile-long list of short-answer questions, but the little paragraph at the top would say "Skip to number six trillion and two, and keep it to yourself." The teacher always reminded us to read the instructions before starting, but do you think I listened? No. I'd practically give myself carpel tunnel trying to answer all the questions before the the timer went off. And just as I'd sit up to wipe the sweat from my brow, I'd notice old Joe Blow kicked back in the corner with a smirk on his face and realize I'd been had.
I fell for it every.single.time.
I'd like to say that I've gotten better in my old age, but I haven't. Like when I made these cornflake-crusted chicken tenders- I cooked them on a regular cookie sheet, even though the directions clearly say to bake them on a rack inside of a cookie sheet. Ah, well. They were still very tasty, even if they *weren't* quite as crispy as they were supposed to be.
I served them up with some homemade honey mustard, which was amazingly awesome. I think my husband's exact words were, "You could practically dunk dog crap in this stuff and it'd taste delicious." I wouldn't go quite that far, but it's definitely a keeper.
Chicken Tenders
As seen on What's Cookin, Chicago?; Originally from Pennies on a Platter
Serves 4
INGREDIENTS
4 boneless skinless chicken breasts, cut into 1-inch strips
1/4 cup flour
1 teaspoon garlic powder
1 teaspoon onion powder
1/2 teaspoon salt
1/4 teaspoon freshly ground black pepper
8 tablespoons (1/2 cup) butter, melted
2 cups finely crushed corn flakes cereal
DIRECTIONS
1. Adjust an oven rack to the middle position and heat the oven to 400˚F. Place an oven-safe cooling rack on a baking sheet and set aside.
2. Combine the flour and spices in a small bowl; set aside. Place melted butter in another small bowl; set aside. Place the crushed cereal in a medium-sized bowl or pie plate.
3. Dip the chicken pieces in the seasoned flour, then the butter, then the cereal. Place the coated chicken strips on the rack in the baking sheet.
4. Bake the coated chicken pieces in the preheated oven for 20 – 25 minutes, until chicken is no longer pink. Serve with your favorite sauce.
Homemade Honey Mustard Dipping Sauce
An Ommy Noms Original
Serves 4
INGREDIENTS
2 Tbsp mayonnaise
2 Tbsp Dijon mustard
3 Tbsp honey
DIRECTIONS
1. Combine all ingredients in a small bowl. Refrigerate for at least one hour before serving.
Saturday, June 18, 2011
Spicy Spinach-Stuffed Chicken
We've all heard the phrase "finder of lost things." Well, allow me to introduce myself- my name is Lauren and I'm the loser of lost things. Yes, if I've lain my paws on it, chances are it got set aside and forgotten. No matter what "it" may be- books, money, or firstborn children. I'm the woman who puts ice cream in the pantry and empty soup cans in the freezer. I look for my glasses while I'm wearing them and keys while I'm holding them. I once found a hundred bucks in a purse I had brought to prom four years earlier.
Anyway, back to the food. This dish has got everything my little heart desires- pepperjack and spinach, all wrapped up in bacony-chickeny goodness. It was a fabulous meal. We ate it, loved it, and enjoyed it.
About 19 months ago.
(Remember the whole "loser of lost things" spiel? Let me just say that
From Allrecipes
Serves 4
* Gluten-free diners should double-check the sour cream for gluten sources. Daisy brand sour cream is gluten free.
INGREDIENTS
1 (10 ounce) package fresh spinach leaves
1/2 cup sour cream
1/2 cup shredded pepperjack cheese
4 cloves garlic, minced
4 skinless, boneless chicken breast halves - pounded to 1/2 inch thickness
1 pinch ground black pepper
8 slices bacon
DIRECTIONS
1. Preheat the oven to 375 degrees F (190 degrees C).
2. Place spinach in a large glass bowl, and heat in the microwave for 3 minutes, stirring every minute or so, or until wilted. Stir in sour cream, pepperjack cheese, and garlic.
3. Lay the chicken breasts out on a clean surface, and spoon some of the spinach mixture onto each one. Roll up chicken to enclose the spinach, then wrap each chicken breast with two slices of bacon. Secure with toothpicks, and arrange in a shallow baking dish.
4. Bake uncovered for 35 minutes in the preheated oven, then increase heat to 500 degrees F, or use the oven's broiler to cook for an additional 5 to 10 minutes to brown the bacon.
Thursday, June 16, 2011
Tomato, Cucumber, and Onion Salad with Homemade Vinaigrette
My husband is Mr. Fix-it. Computers, lawn mowers, ancient video game systems- you name it, he can fix it. (Case in point: He bought an Ipod from Goodwill this week for four bucks and had it working in less than an hour!)
Anyway, he's become the go-to man in the neighborhood for computer and small-engine repair. In return, our neighbors often bless us with goodies from their gardens. It's not uncommon for us to come home to a bag of grapefruit or cucumbers on our front stoop. One time, we even came home to find our ugly, overgrown aloe vera plant cleaned up and looking spiffy. (Yessss!)
For lunch today, I made a salad with a cucumber and heirloom tomato from the neighbors, along with one of my deliciously sweet Noonday onions. I topped it with a quick homemade vinaigrette. It was light and refreshing.
An Ommy Noms Original
Serves 1-2
INGREDIENTS
1 medium tomato, diced
1 small cucumber, thinly sliced
1/4 cup sweet onion, thinly sliced
1 tbsp olive oil
1 tsp vinegar of your choice (I used white wine)
1 garlic clove, minced
1 fresh parsley leaf, finely chopped (optional)
Salt and pepper to taste
DIRECTIONS
1. Layer cucumber, tomato, and onion pieces in a medium bowl. Combine oil, vinegar, garlic, and parsley in a small prep dish. Mix with a fork and add salt and pepper to taste. Pour dressing over vegetables and enjoy!
Wednesday, June 15, 2011
Shrimp Pasta Salad
It's funny how the simplest dishes are often the most enjoyable. As a child, I was always so excited to come home and find a big bowl of this shrimp pasta salad chilling in the refrigerator. A couple decades later, it's my husband's number one most requested meal.
I'm not complaining. :-)
From Mom
Serves 4
INGREDIENTS
2 cups small pasta of your choice
3/4 pound shrimp, boiled
3 hard-boiled eggs, peeled and diced
1 medium tomato, chopped
3 green onions, finely sliced
1/2 cup shredded cheddar cheese
Mayonnaise to coat, about 3/4 cup
DIRECTIONS
1. Prepare pasta according to package directions, and drain well. Place in a large bowl. Add remaining ingredients and toss to coat. Chill for at least one hour prior to serving.
Recipe Swap- Sausage Breakfast Sandwich
I participated in my very first recipe swap this week. I contributed a cake batter pancake recipe, and received this recipe for sausage breakfast sandwiches.
I'm not usually a big breakfast sausage fan, but I enjoyed this sandwich. It was nice to get out of my comfort zone. Thanks, Sweet Beginnings!
From Sweet Beginnings
INGREDIENTS
1/2 lb Ground Pork or Breakfast Sausage
1 Tbsp maple Syrup
1 Tbsp grape Jelly
1/4 tsp salt
1/4 tsp black pepper
1/2 tsp red pepper flakes
1/2 tsp garlic powder
1/2 tsp dried thyme
1/2 cup shredded cheddar cheese
4 slices Applewood smoked bacon, cooked & crumbled
4 eggs
4 slices cheese (your choice!)
4 mini croissants (or English Muffins or Biscuits, if you prefer)
DIRECTIONS
1. Mix pork, bacon, maple syrup, jelly, salt, pepper, red pepper flakes, garlic powder, thyme & shredded cheese together in a bowl. Refrigerate for 10 minutes.
2. Form sausage mixture into four 1/2 inch patties, big enough to fit on your biscuit. Heat a skillet to medium-high and cook patties until there is no pink in the middle, 3-5 minutes per side.
3. Meanwhile, spray another skillet with cooking spray and cook your eggs over-medium. Season with salt & pepper to taste.
4. If using biscuits, bake according to package instructions or recipe directions. Otherwise, toast your English muffin or Croissant, and spread jelly or butter on each side if you prefer. Then layer with your sausage patty, egg, & cheese.
Tuesday, June 14, 2011
Brandy-Baked Peaches
You know how you go to the grocery store to get one thing and leave with your arms full? I had one of those grocery trips today. I just couldn't resist the scent of locally grown peaches, so two of them ended up in my basket.
(Along with about a million other things.)
I searched for a peach dessert that I could throw together with minimal effort, and settled on baked peaches with a brown sugar & brandy glaze. Oh my, they were delicious. I only wish I had bought more peaches!
Adapted from The Daily Iberian
INGREDIENTS
1/4 cup brown sugar
2 tbsp butter
1 tbsp brandy
2 peaches
Whipped cream, optional
DIRECTIONS
1. Preheat oven to 350 degrees. Peel peaches and cut into quarters. Remove pit and discard. Place peaches in an oven-safe glass baking dish. (I used a small Corningware dish.)
2. Melt the butter in a small saucepan. Add the brown sugar and brandy, and stir to combine. Drizzle over peaches.
3. Bake the peaches in the preheated oven until soft, about 30 minutes. Top with whipped cream, if desired.
Subscribe to:
Posts (Atom)